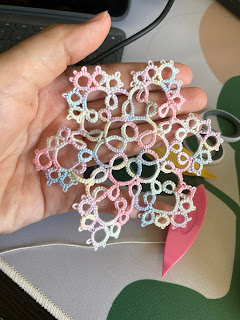
Last year (?) I picked up needle and shuttle tatting. I decided to stick with shuttle tatting for the long-term, but was having some issues with ergonomics and reading patterns and tension. Somehow, taking a break from tatting entirely has resolved those issues entirely.
Here's my first piece from after my break Solstice (scroll to the bottom for the free pattern) by Tatting by the Bay:
The far left is my first try -- don't recall what went wrong, but I think I didn't count something properly. Second attempt is definitely a counting issue. And the third, much larger one? That also has a mistake (a missing ring in the second round). Anyway. It worked eventually, as you can see from this post's first photo.
Encouraged by my success, I purchased a pattern for and started a much larger project. The first piece above is my first attempt, with what is considered normal tatting, where work is reversed for changes in stitch direction. I was also paying attention to front side/back side, and reversing the order of stitches when reversing the side of my work, all to try and make things look neater.
I was having some rippling issues, but was overall happy with how things were going. Till I tried unflipped chains.
The second, lower piece of tatting in the above photo features my new favorite technique -- unflipped chains. The piece lies flatter and is more even all around, plus it took far less time for me to tat it.
Here's the first round of that doily:
And the almost-finished third round:
I'm finding this relaxing and enjoyable! I also really like this rainbow-y pastel yarn. Multicolored yarns get a bad rap for tatting, but I find myself admiring how this one looks quite often.


Comments
Post a Comment
Comments? Concerns? Criticism?