Button holes can be done by hand. But... you might make the button hole too small or too big, and there's probably lots of them to do! If only there was a quick way to do button holes on a straight-stitch only machine...
Well, there actually is!
You'll need a very specific attachment though. (How I got mine).
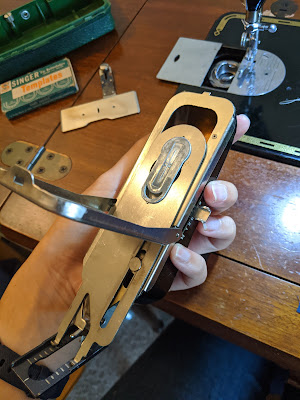
The buttonholer is a marvelous thing. It's very loud (clack-clack-clack) but produces amazingly consistent button holes. And it manages to do it on a straight-stitch only machine!
Here's the underside of the buttonholer, with the bottom popped off. This is how you swap out cams.
Here's how the buttonholer is attached to the machine. There's a lever arm that rests on the needle bar, plus it's screwed in the same way as any other foot would be.
Crucially, you'll also need a feed dogs cover plate screwed on, with the needle hole still open. If you don't have one, the fabric/threads will catch and pull things out of shape. If you cover the needle hole, well, you'll have a very broken needle and messed up machine timing!
I think dropping your feed dogs is sufficient as well, but you don't need to do both!
In action!
I've found that two to three layers of stitching make a good, solid button hole.
After the button hole is made, you remove the fabric from the machine, snip the threads, and use a seam ripper or scissors to very carefully clip the button hole open.
Some slow-motion so you can see the zig-zagging:


Comments
Post a Comment
Comments? Concerns? Criticism?